Getting started with PHP development on Windows usually starts with having a web server installed, to quickly start developing and debugging your PHP codes. The popular picks are usually XAMPP, or IIS if you prefer Microsoft’s built-in component.
In this article, we’re building a web server with Laragon, a new rising star in recent years to run a lightweight, fast and customizable web server on Windows operating system to kick start your PHP development.
*We also have a XAMPP tutorial for PHP deployment on Windows:
- Deploy a webserver with XAMPP on Windows for PHP developmentAn in-depth guide to quickly deploy a webserver with XAMPP on Windows for your PHP development projects.
Tutorial StartsInstall and configure Laragon on Windows
Prerequisites
Laragon works with Windows 8, Windows 10, and Windows 11. We haven’t tried other Windows versions yet and will update the article when we confirmed the compatibility with other Windows versions.
Download Laragon on Windows
Navigate to Laragon Official Website Download page:
Official Laragon download page
Next, simply choose the Laragon version you wanted to download.
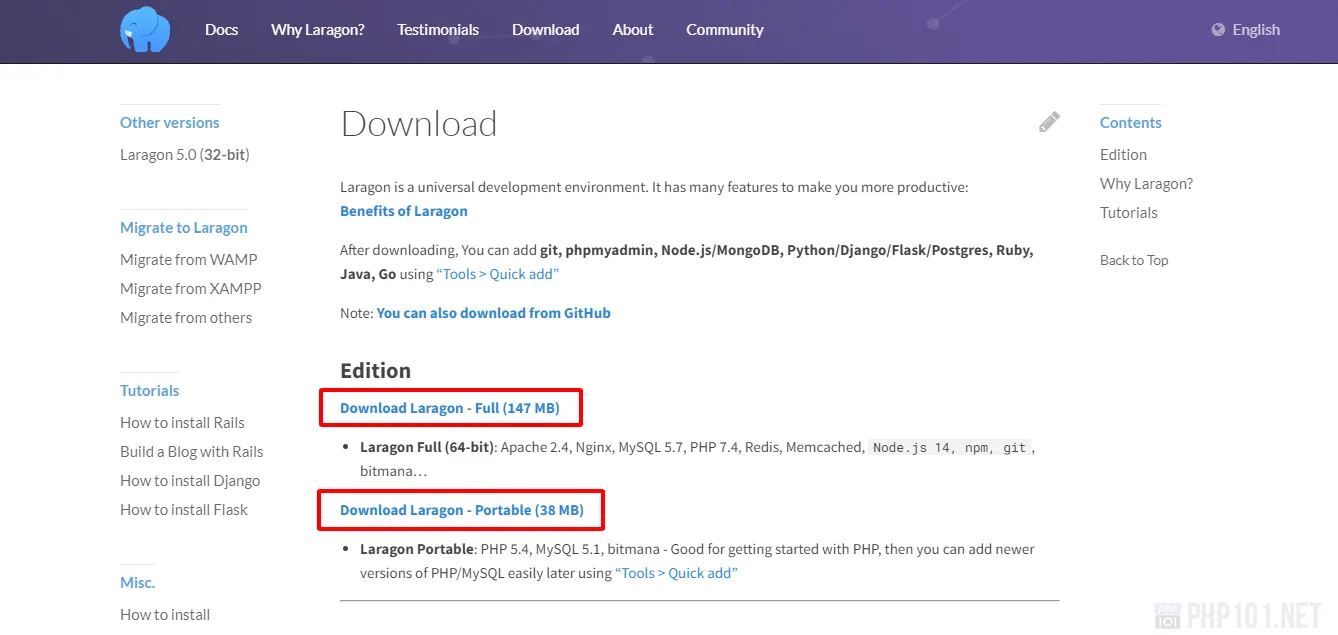
There are two main Laragon on Windows versions to pick from:
- Full version: Comes with more modern software (PHP, MySQL) versions (MySQL 8.0.30, PHP 8.1 at the time of this article). Recommended version by default.
- Portable version: Older software versions (PHP 5.4, MySQL 5.1 at the time of this article), probably for download size optimization.
Basically, it’s recommended to download the full version of Laragon as it comes with newer software. Portable version could work if you prefer smaller size or portability purpose. Whichever version you pick, it will be very easy to add/modify software versions bundled with Laragon for your PHP development on Windows.
Install Laragon – Full installation
After downloading the Full version of Laragon, run the installation package. Click Next until you see this location dialog:
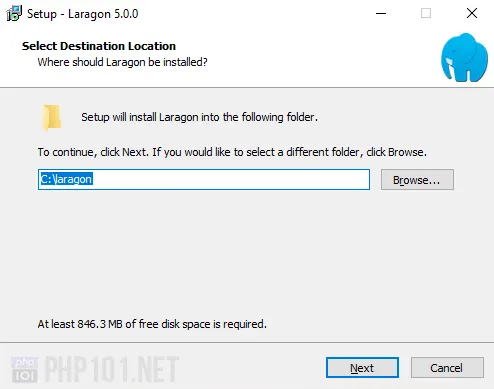
Choose the location to install Laragon on Windows. It is recommended to install on other drives than Windows system drive (other than C drive). Click Next after choosing the location.
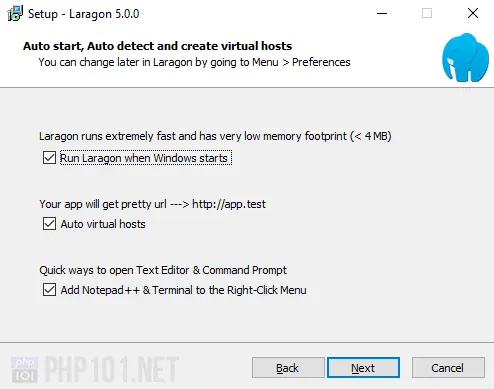
We will have another three useful settings here:
- Run on starts: Check if you want Laragon to auto-run on Windows starts. Definitely yes for a hardcore PHP developer
 .
. - Auto virtual hosts: One of the most useful features of Laragon, making web development with it extremely versatile. Check it, please.
How does it work?
– Adding a new localhost site on XAMPP? You have to configure Apache.conffile, adding new records to Windowshostsfile, reload Apache…
– In Laragon, just create a new folder on Laragonwwwdirectory – eg,D:\laragon\www\myweb, pressReloadon Laragon, and… done! Your new site ishttp://myweb.test– Isn’t that great? - Open with Notepad++ and Terminal: Allow you to quickly open the file using Notepad++ (if it’s installed) or the folder on Windows Terminal (PowerShell) using the context menu. It’s up to you on this option, we’d pick it.
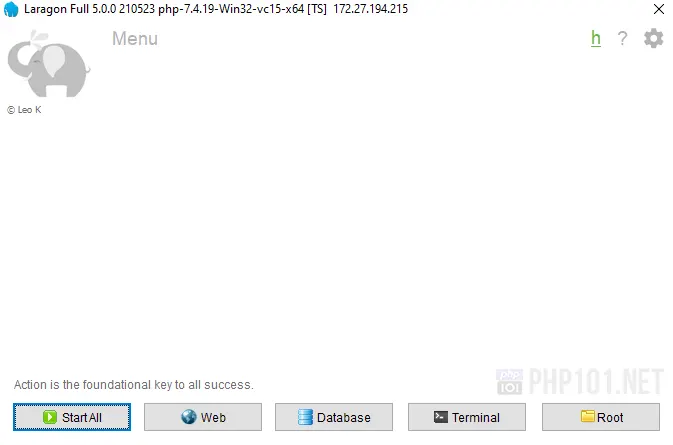
Click Next and Laragon will start the installation. When finished, run Laragon Control Panel.
Laragon is now fully installed and ready to use.
Install Laragon – Portable version
For Laragon portable version, it’s recommended to install Visual C++ Redistributable first, which can be downloaded on the Microsoft website (under Other Tools, Frameworks, and Redistributables section):
https://visualstudio.microsoft.com/downloads/
After the installation, we assume you already downloaded the portable version of Laragon.
Simply extract it to a folder, and run the file laragon.exe in the extracted folder, which is Laragon Control Panel:

The portable version of Laragon is ready to use.
Start PHP development with Laragon
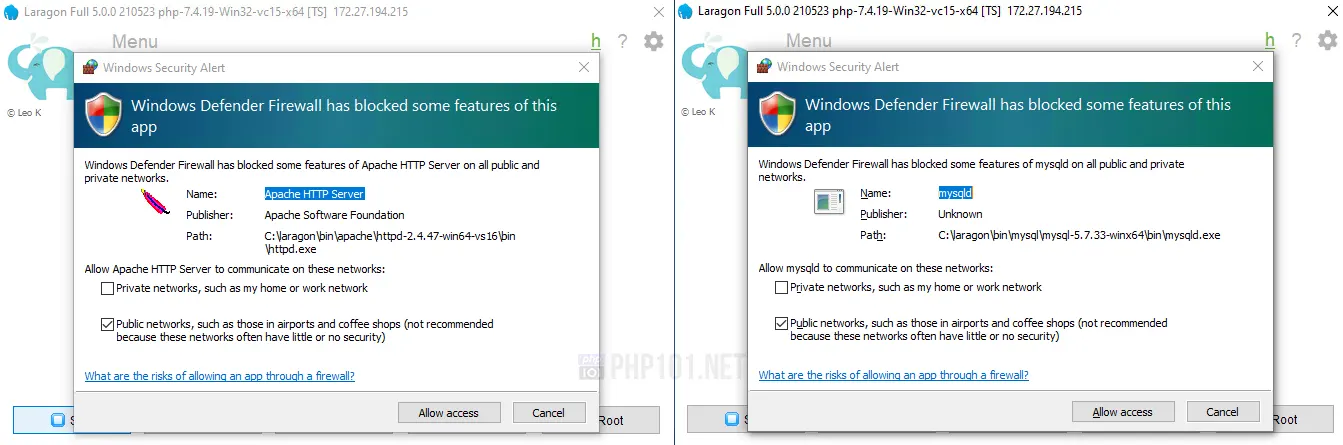
On Laragon Control Panel, simply click StartAll to start the services (Apache, MySQL). You might encounter these security alerts which ask for network permission. Simply choose your preferred network type, or none if you prefer to work on your local machine only, and click Allow access:
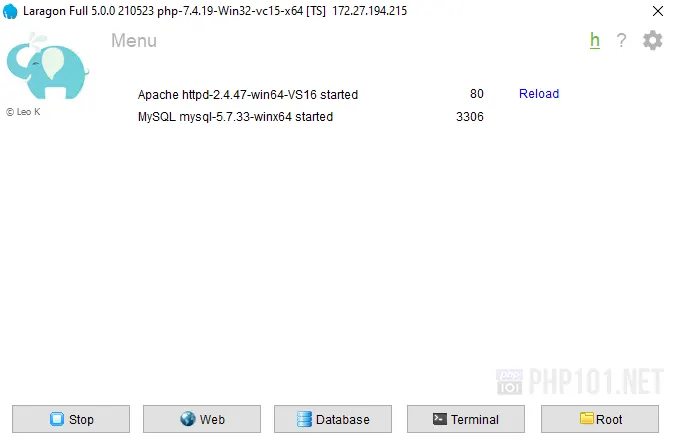
The services then will be running properly:
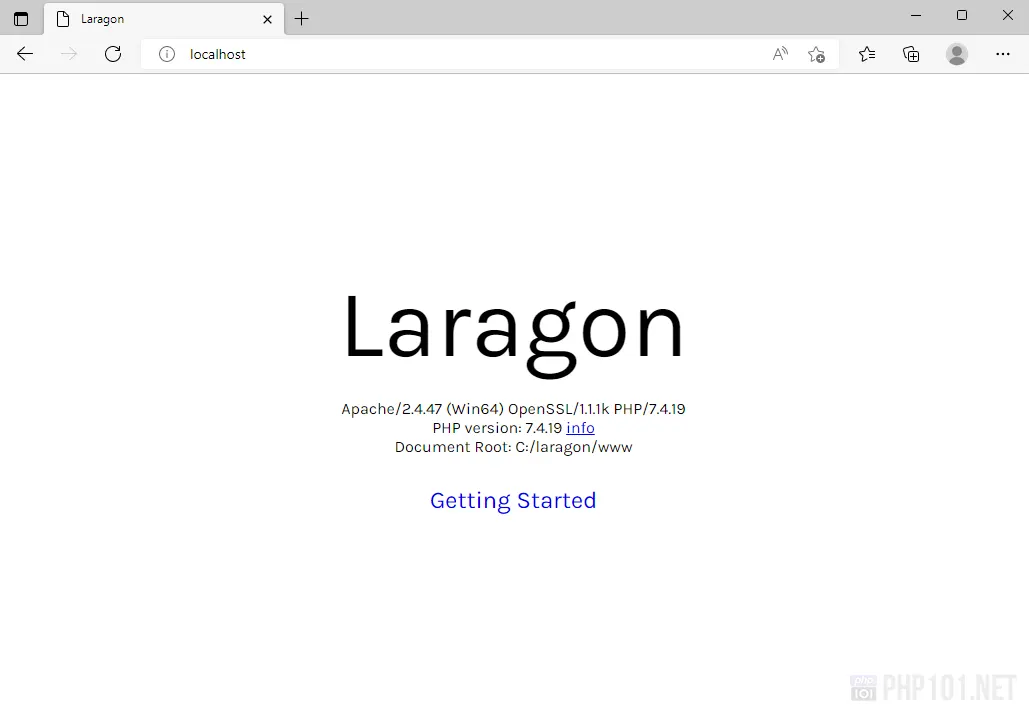
You can start browsing http://localhost to confirm that the web server is running properly:
If your Laragon installation is using Nginx (usually on Laragon portable version), you will see this warning instead:
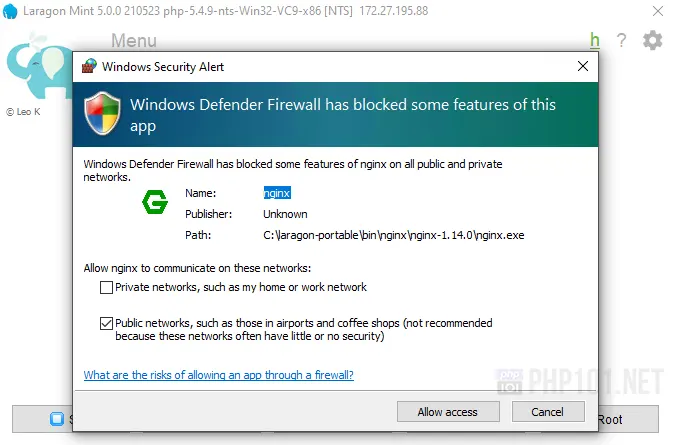
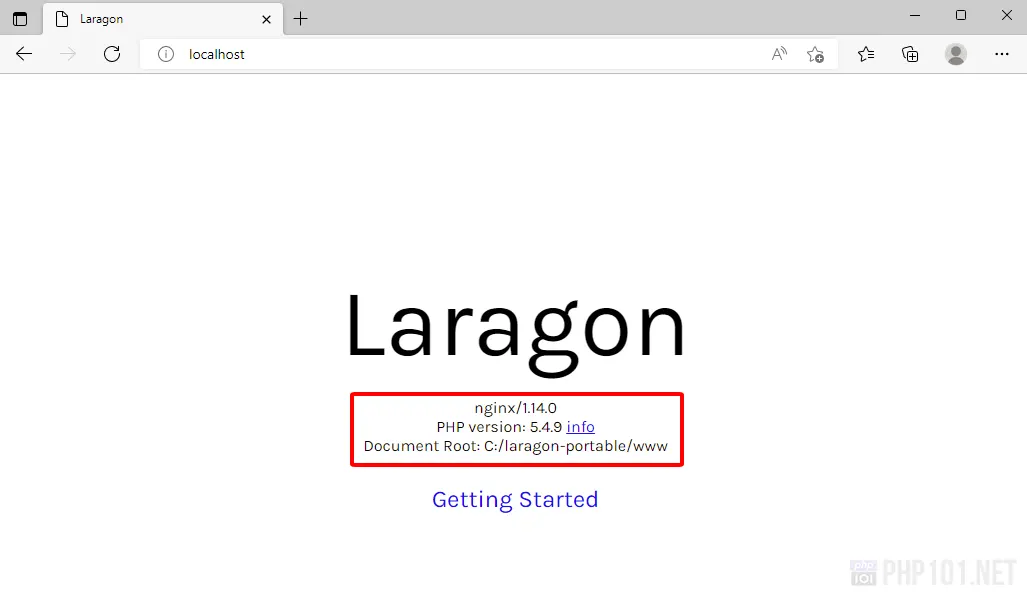
Again, allow access and try browsing http://localhost will show Laragon with Nginx installed and running:
Laragon default web files folder
The default Laragon files are stored in [Laragon installation]\www\ folder:
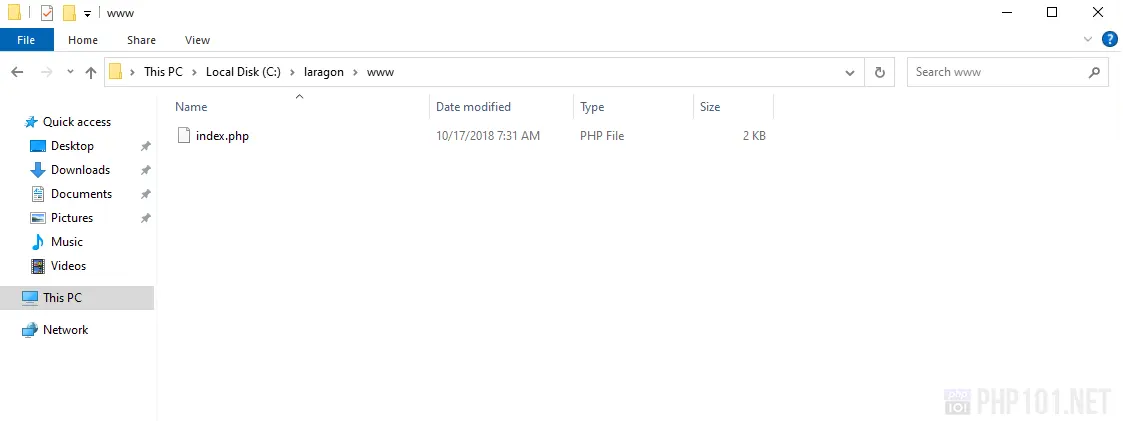
By default, any files you add here can be browsed with http://localhost address, eg. file.php will have http://localhost/file.php URL.
Add new site in Laragon
What if we want to have a custom domain for development? Like, myweb.test?
As mentioned, Laragon has a great feature for adding new domains and virtual hosts by adjusting configurations of Windows hosts file automatically.
Simply:
- Create a new folder in Laragon’s
wwwfolder. - Click
Reloadon its Control Panel, and you have a new site ready for development.
For example, C:\laragon\www\test01 will have the domain of http://test01.test.
Making Laragon installation available on the Internet
By default, when you have allowed access to the security dialog upon first running Laragon services, your web server should be accessible publicly (depending on the network type you allowed). In case you didn’t do so, or some configuration went off, here is how to allow network access for Laragon web server components.
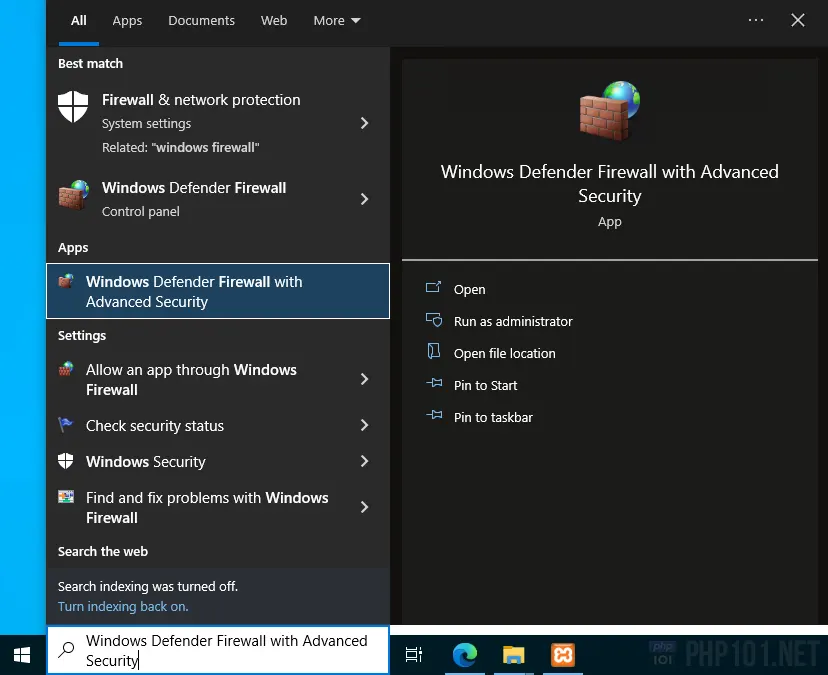
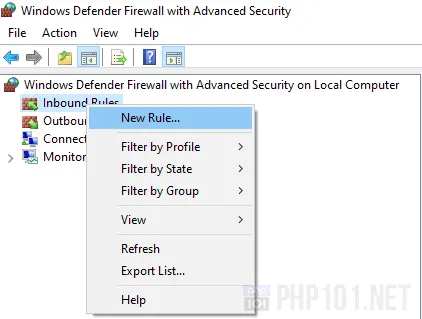
Go to Windows Defender Firewall settings:
On the Inbound Rules, right-click and choose New Rule…
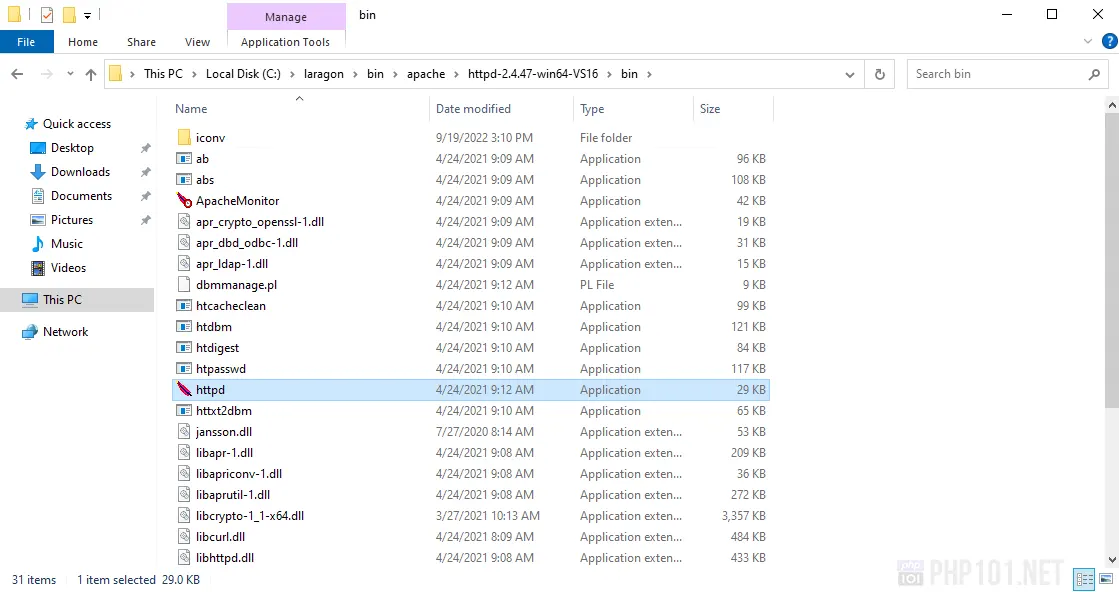
Choose Program on the first dialog, and pick Laragon’s Apache executable file (httpd.exe) in Laragon’s \bin\apache\[Apache version]\bin\ folder:
*For Nginx, the executable file is [Laragon folder]\bin\nginx\[nginx version]\nginx.exe file.
Choose Allow the connection on the next dialog, set the network types and name for the rule, and save it.
The web server bundled with Laragon should have network access for now.
*You still have to configure port forwarding on your modem/router to allow the web server port (default – 80) to be accessible over the Internet. We will not go into detail on that here because it depends on different modem/router types.
Change Laragon installation PHP version
We have a dedicated article on how to change Laragon on Windows PHP version, and it’s surprisingly very easy. Check that out:
- How to change Laragon PHP version on WindowsIn-depth tutorial on how to switch Laragon PHP version on Windows.
Final thoughts
The tutorial is now over. Laragon on Windows makes PHP development really quick and convenient. Compared to XAMPP, Laragon has many advantages over speed, performance, and is more customizable overall. However, XAMPP does have minor winning points, like, you can run multiple PHP versions at the same time easier with XAMPP – Laragon only allows one PHP version to be run at a time by default. So generally, it depends on your use cases.
We hope that the tutorial could be useful for you to kickstart your PHP development with Laragon.
