This is a detailed, in-depth tutorial on how to install PHP on Windows using standalone method.
Which usage purposes can this tutorial used for?
The standalone PHP installation method is used when:
- You want to only install PHP into the system, not the whole web application package (Apache, MariaDB, etc.);
- You want to install PHP for simply running PHP commands using Windows command-line terminals;
- You want to update or replace PHP on the system for library inclusion in PHP IDEs (eg. PHPStorm, Visual Studio Code);
- You want to update or replace the existing PHP version in all-in-one web server packages (eg. XAMPP, Laragon).
If you plan to install full web application stack including PHP, we are going to release another in-depth tutorial soon. Stay tuned!
Tutorial StartsIn-depth PHP on Windows installation tutorial – Standalone method
Here are all of the necessary steps to get PHP installed and working on Windows properly.
1. Windows prerequisites
- At least Windows 2008 or Vista, either 32-bit or 64-bit (x86 or x64, 64-bit preferred);
- PHP does not run on Windows RT/WOA/ARM;
- From PHP 7.2.0, Windows 2008 and Vista are no longer supported (See PHP.net Windows Requirements).
2. Install requirements
- PHP on Windows requires Visual C++ Redistributable to run. To download it, head to the official Visual Studio download URL:
https://visualstudio.microsoft.com/downloads/ - Navigate to the Other Tools, Frameworks, and Redistributables section (screenshot below);
- Pick the version you want to download (x64 for 64-bit and x86 for 32-bit), and click Download.

- Install the downloaded package.
3. Download PHP
- Go to the official PHP.net Windows download page:
https://windows.php.net/download/ - On the right side, you can see the panel where you will be able to pick the PHP version to download.
Here you can pick the PHP version in number and in thread support to download.
This page displays only the latest stable versions, current versions are 7.4, 8.0 and 8.1.
To access older PHP versions, you can go to the archive page:
https://windows.php.net/downloads/releases/archives/
- Next, Choosing the right thread support version is important for performance with PHP on Windows. To keep it short in this article, we will quickly point out the recommended option:
- If you use native Apache (with LoadModule) or IIS , choose the Thread Safe version.
- If you use Apache with FastCGI or IIS with FastCGI, choose the Non Thread Safe version.
It is recommended to use Apache with FastCGI (fcgi) for handling multiple PHP processes, as common web application packages (XAMPP, Laragon) are bundled with FastCGI too. Therefore, the recommended option is the Non Thread Safe version.
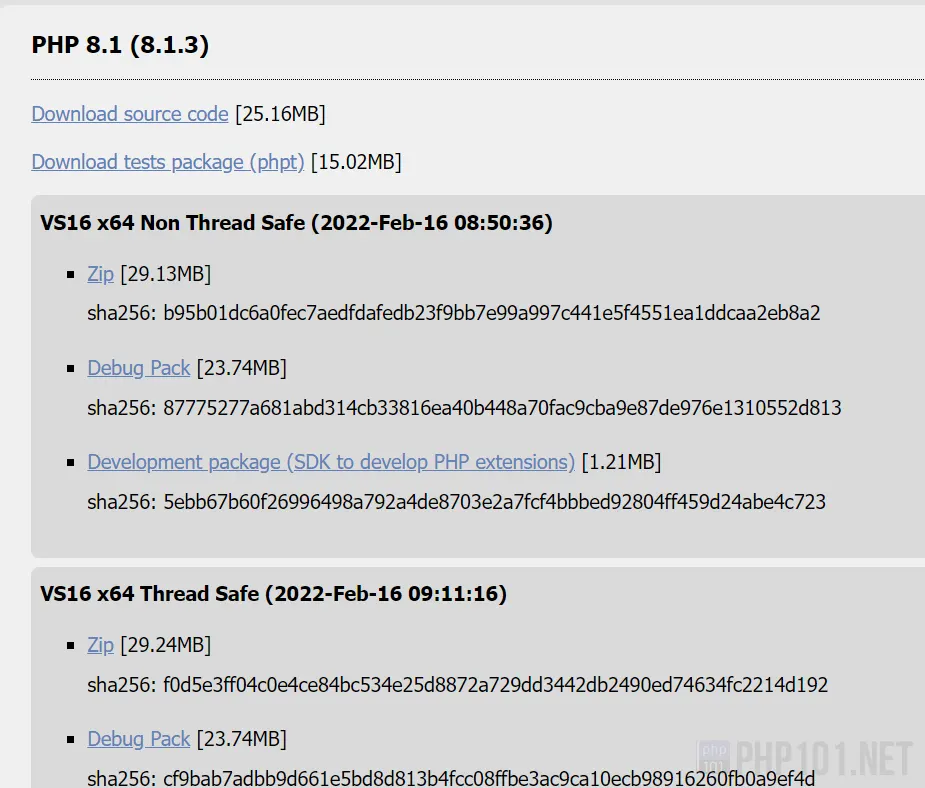
You can start downloading the PHP package with the Zip option to your computer.
4. Extract downloaded PHP package
After downloading, extract the downloaded PHP package to a directory. It is recommended to extract the files to a non-system drive (eg. C drive), and within a short path, with no spacing.
For example, the PHP package files are extracted to the folder D:\php :
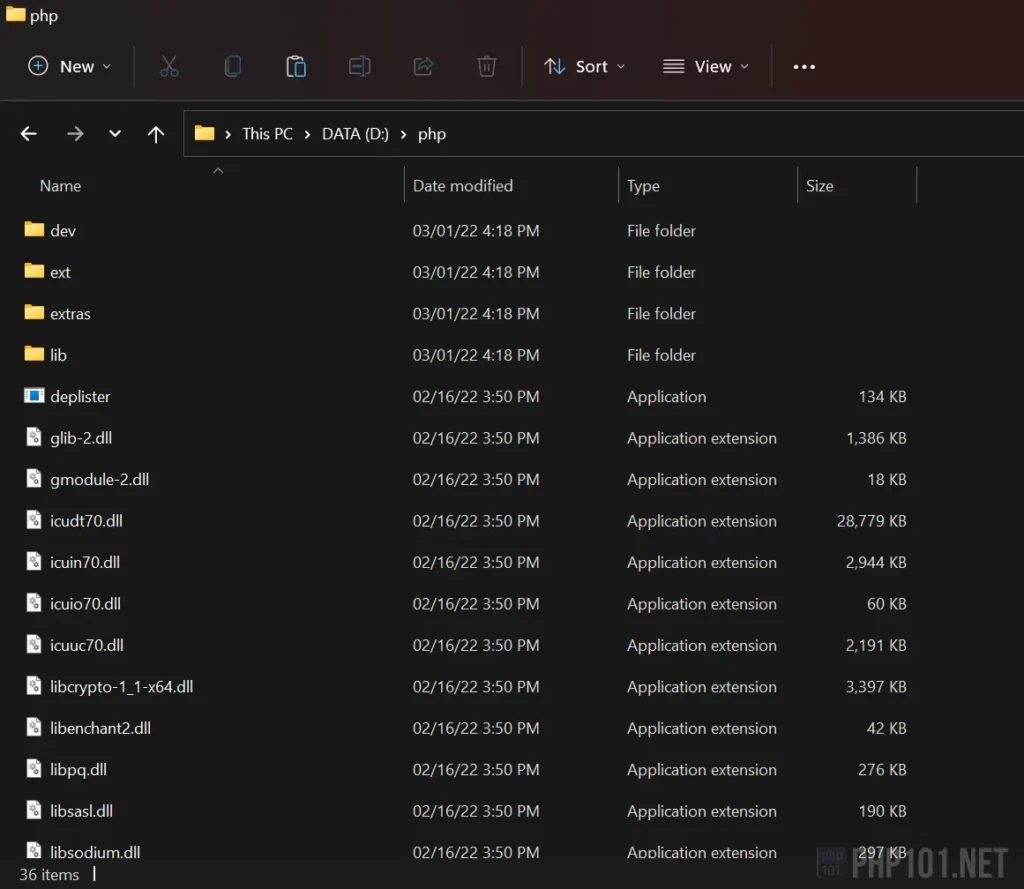
Here, the installation of PHP on Windows can be considered as completed. However, to make PHP fully usable, we are going to set the Environment Variables for it, so it can be run on Windows command line terminals.
5. Set Windows Environment Variables
To configure PHP command line to be usable on any Windows command line terminals, follow the steps:
5.1. Open the System Properties dialog by pressing Start and type environment variables into it. Then, select the showing option (works with all Windows versions, the below screenshot is Windows 11):
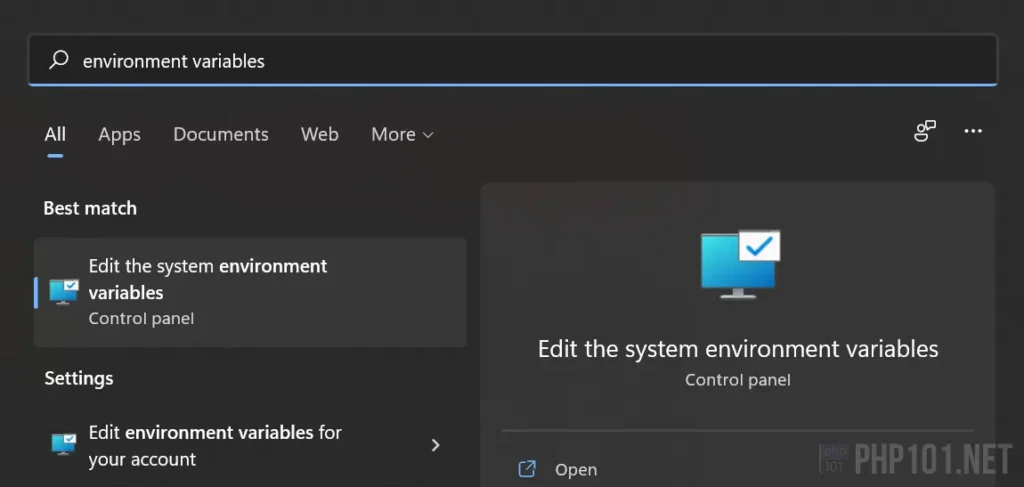
5.2. On the System Properties dialog, click the Environment Variables… button.
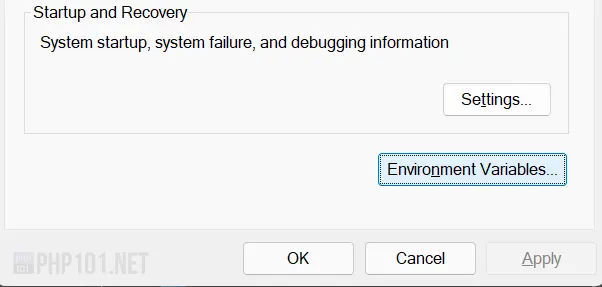
5.3. On the Environment Variables dialog:
- If you want PHP commands to be applicable for the current user only, use the
User variables for [your user account name]section. - Or, if you want the commands to be system-wide, use the
System variablessection.
On either section, choose the row with the Path name on the left, an click Edit.. button.
For example, this screenshot is for user only, and the user name is “Laptop”:
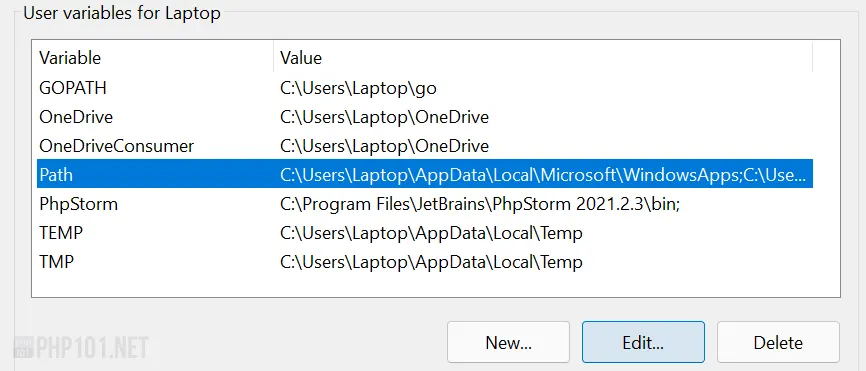
5.4. On the Edit environment variable dialog, click an empty row and press New (double click it also works), then type in the path of the directory having extracted the PHP package files.
In this case as of the previous step, the path is D:\php\:
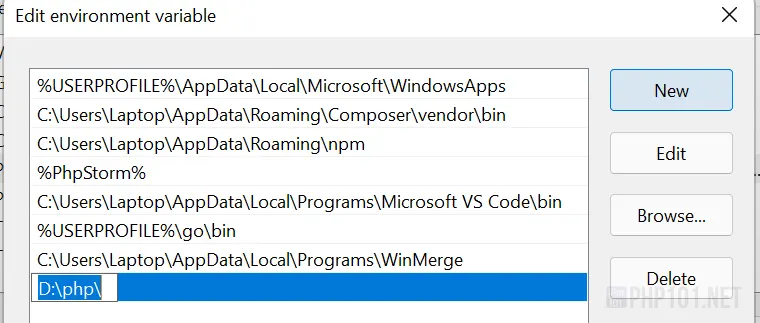
After that, click OK to the Environment Variable and System Properties dialogs to close them.
We will have a last step to verify that the adjustment works.
*You might have to restart your computer after changing Environment Variables for the change to take place.
6. Verify installation
Open any type of Windows command-line terminal (cmd.exe, PowerShell, VSCode terminal, etc.), type in this command:
php -vIf everything works, the command will return the information of the PHP package that we have downloaded and extracted. For example, using PowerShell with the command:

If it returns any errors, double check that:
- The Environment Variables for PHP path is correct;
- The computer might have to be restarted.
Conclusion
The above in-depth tutorial is for getting PHP to be installed and working properly on Windows, using standalone method. You can then safety adding PHP as include paths into PHP development IDEs after installing using this tutorial. To update the PHP version, simply download another PHP package and overwrite the files to the PHP directory path.
Thank you for reading and we hope this is a clear and detailed PHP tutorial for anyone to follow.

