ImageMagick is a powerful free and open-source software for image manipulation. It is fully cross-platform and mainly used by many websites for processing images. ImageMagick has a PHP extension that makes it easy to use, powerful and is usually preferred more than PHP GD extension.
This tutorial will guide you on how to install ImageMagick on Windows operating system and make it works properly as a PHP extension.
Note: This article is solely focused on installing and getting ImageMagick to work with PHP in Windows system, and will not explain non-related PHP parts into details.
Prerequisites
This article assumes that you already got a webserver running properly with PHP installed and enabled.
Windows System Requirements
As mentioned on official ImageMagick download page, the software is fully compatible with most Windows version, from Windows Server 2008 R2 (x64) to Windows 11. Unless you wanted to install it on ancient versions as Windows 95 (!), we are good to go.
A single core Windows computer with minimum 512MB of RAM should be suffice to run ImageMagick, although having more will provide better performance. Both 32-bit, 64-bit and ARM64 system is compatible.
1. Download ImageMagick Windows package
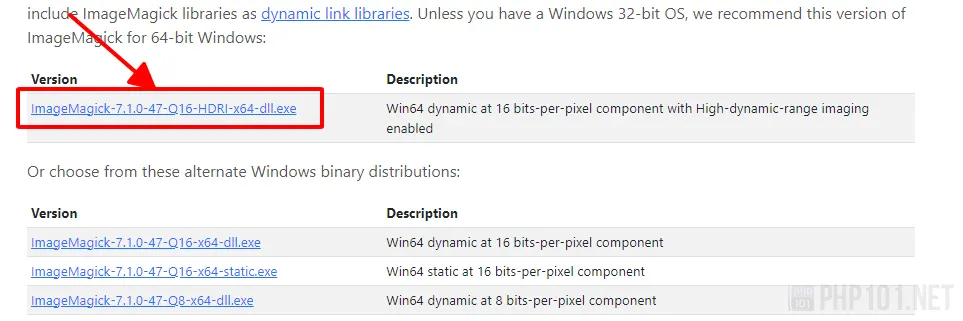
Go to the Official ImageMagick download page and scroll to the Windows Binary Release section. You will see a table with plenty of versions to download.
To keep things simple, choose the recommended version that is listed at the first of the list to download:
Otherwise, in case you wanted more customized version for your system, choose version that has the filename that suits your system to download:
- Choose dynamic version with dll in filename, which is more preferred for using PHP to work with.
- Version with Q8 is for 8 bits-per-pixel image processing, while Q16 provides 16 bits-per-pixel.
The latter uses more resources, but will have much better image precision. Usually, with 1GB+ memory, it’s fine to use Q16 version. - Version with HDRI will enable High Dynamic Range Imaging processing, and is recommended.
- For 64-bit system, choose the version with x64 in filename.
For 32-bit, choose x32, and for ARM64, choose arm64. - Choose installer version with exe extension, which will setup and configure the paths automatically for you (again, let’s keep things simple). If you choose portable version, you will have to set the environment paths manually.
2. Install ImageMagick on Windows
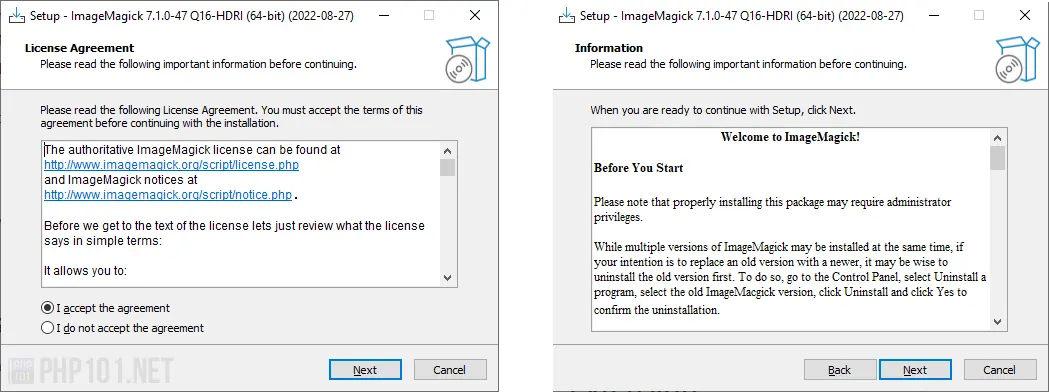
After downloaded the preferred version (which is installer version having exe extension), run the file to start the installation.
Accept the license and information:
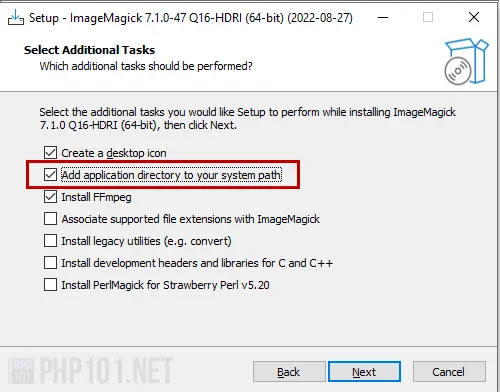
Ensure “Add application directory to your system path” is checked, so the installer can configure the environment paths for you, making things easier. If you want to process FFmpeg video, check the Install FFmpeg option, else it can be left unchecked.
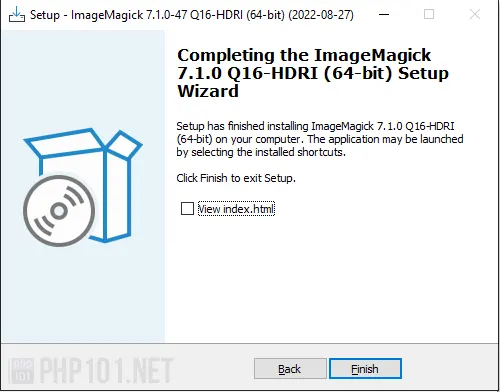
Click Install on the next screen, and ImageMagick will be installed. You can view the index.html introduction page or uncheck it and finish the installation.
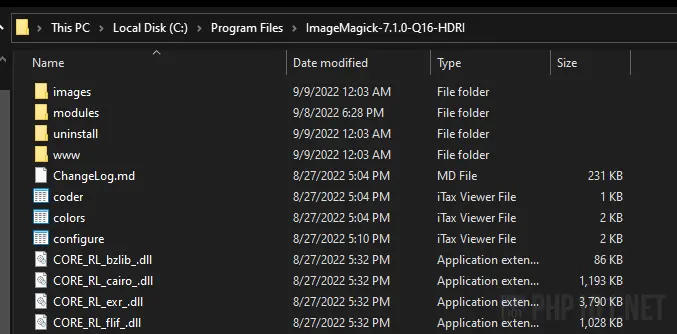
By default, it is installed on C:\Program Files\ImageMagick-{version}, which contains all of the Windows executable files that are ready to use with PHP.
Verify ImageMagick installation
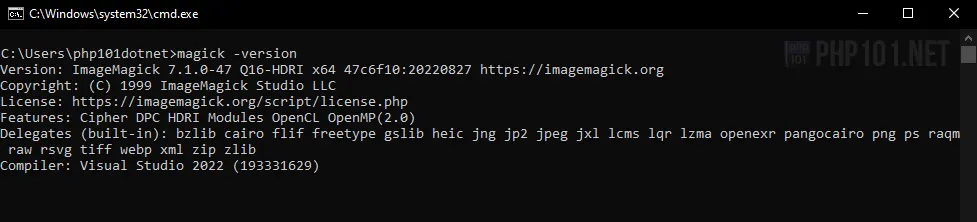
To verify if ImageMagick is installed on Windows, open a terminal console as cmd and run the command:
On successful installation, the command will return with ImageMagick version, and built in modules:
Now we have ImageMagick on Windows installed, in the next steps, we will also get the ImageMagick PHP extension installed for them to work together.
3. Download ImageMagick PHP extension
Depends on your installed PHP version, the recommended version for ImageMagick PHP extension will be different accordingly.
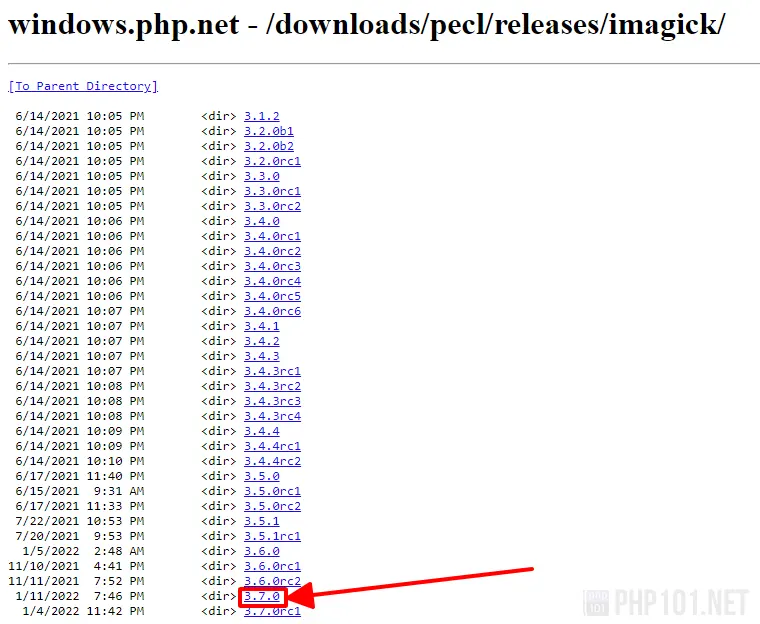
First, head to the Official Windows PHP PECL extension for ImageMagick release page. Then, choose the download according to the installed PHP version, or else the extension will not work properly.
- For PHP 7.4 to 8.1, choose the 3.7.0 version of the extension.
- For PHP 7.3, choose 3.6.0 extension version.
- For PHP 7.1 to 7.2, choose the 3.4.4 extension version.
- For PHP 7.0 and below, choose the 3.4.3 extension version.
- Any extension version below 3.4.3 is not recommended.
For example, to choose version 3.7.0 of the extension, click the 3.7.0 version URL:
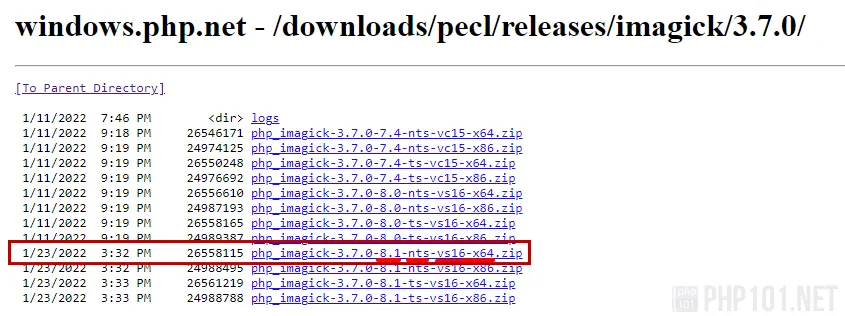
Then, pick the recommended download for your system and PHP version.
- For non-thread-safe version, choose
ntsfilename, for thread-safe version, choosetsversion.
Quick recommendation: If you use XAMPP or Laragon to host the webserver, choosentsversion.
If you use IIS for webserver, choosetsversion. - For 32-bit version, choose
x86filename, for 64-bit version, choosex64filename. - It’s recommended to pick the higher Visual Studio compiled version, which is
vs16.
For example, the recommended extension download for for PHP 8.1, 64-bit system, non-thread-safe version:
After downloading, extract the package to a folder. We are ready to install the ImageMagick extension to the existing PHP installation.
4. Install ImageMagick PHP extension
After extracting the downloaded extension zip file, we can install them to our PHP installation.
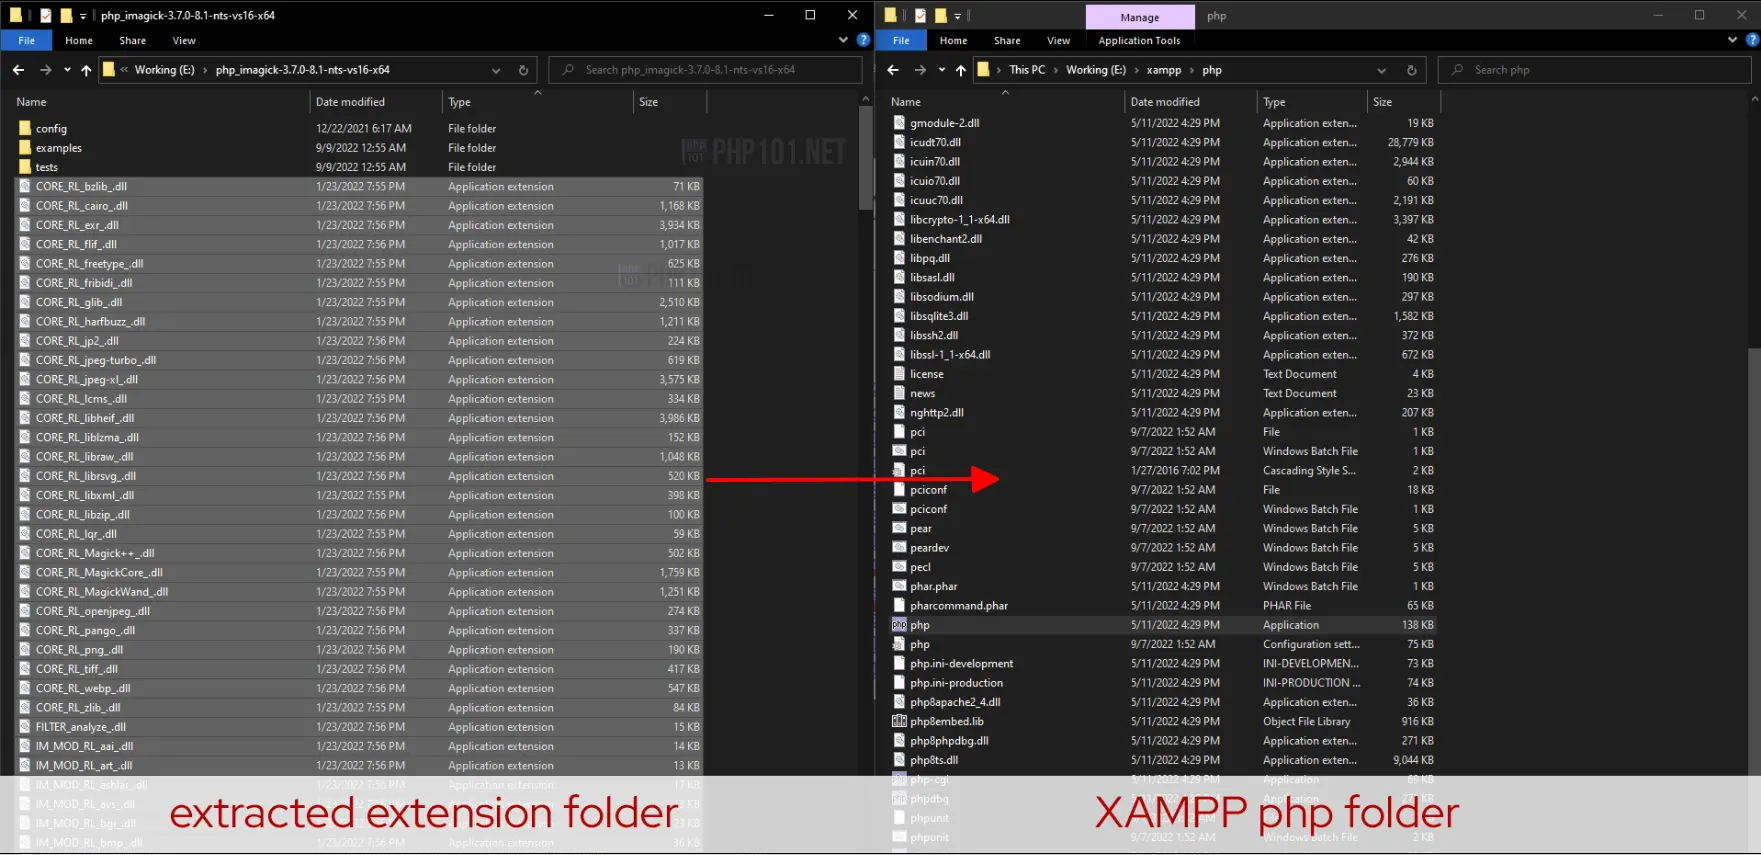
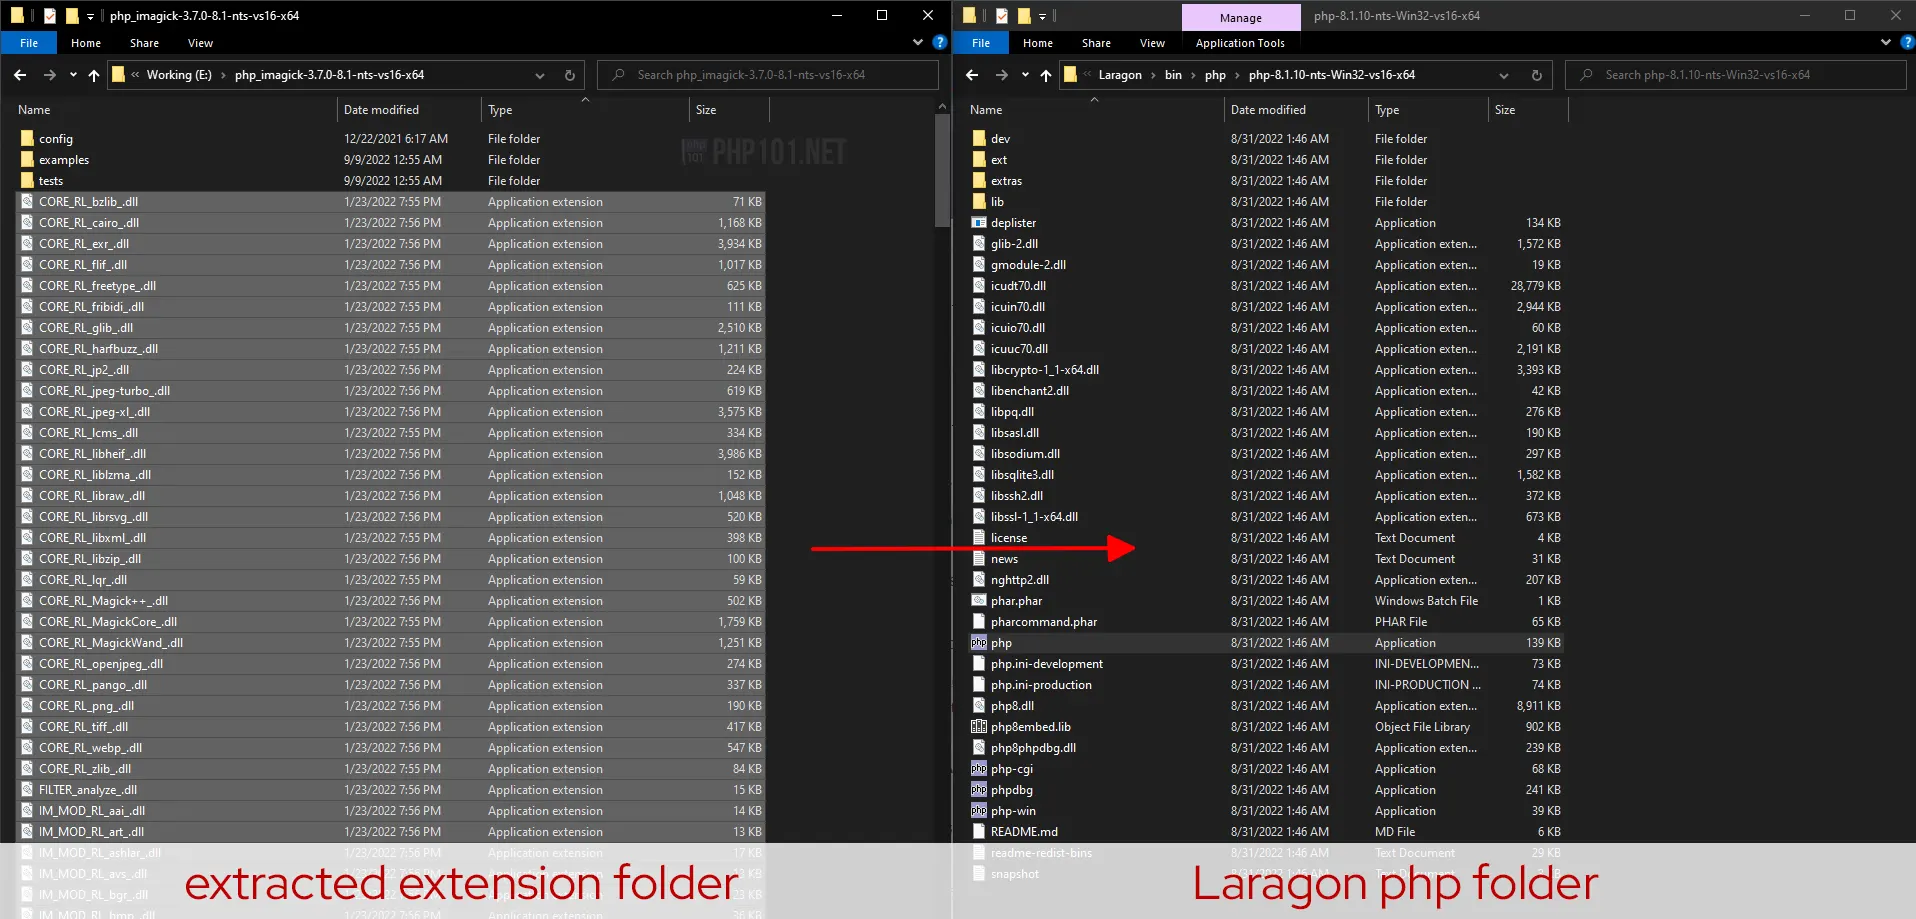
First, copy all of the .dll file in the extracted folder to the PHP installation folder where php.exe is located.
For example, with XAMPP (php folder in [XAMPP folder]/php):
For example, with Laragon (php folder in [Laragon folder]/bin/php/[php version folder]:
Then, copy/move the php_imagick.dll file to the ext folder of PHP installation folder:
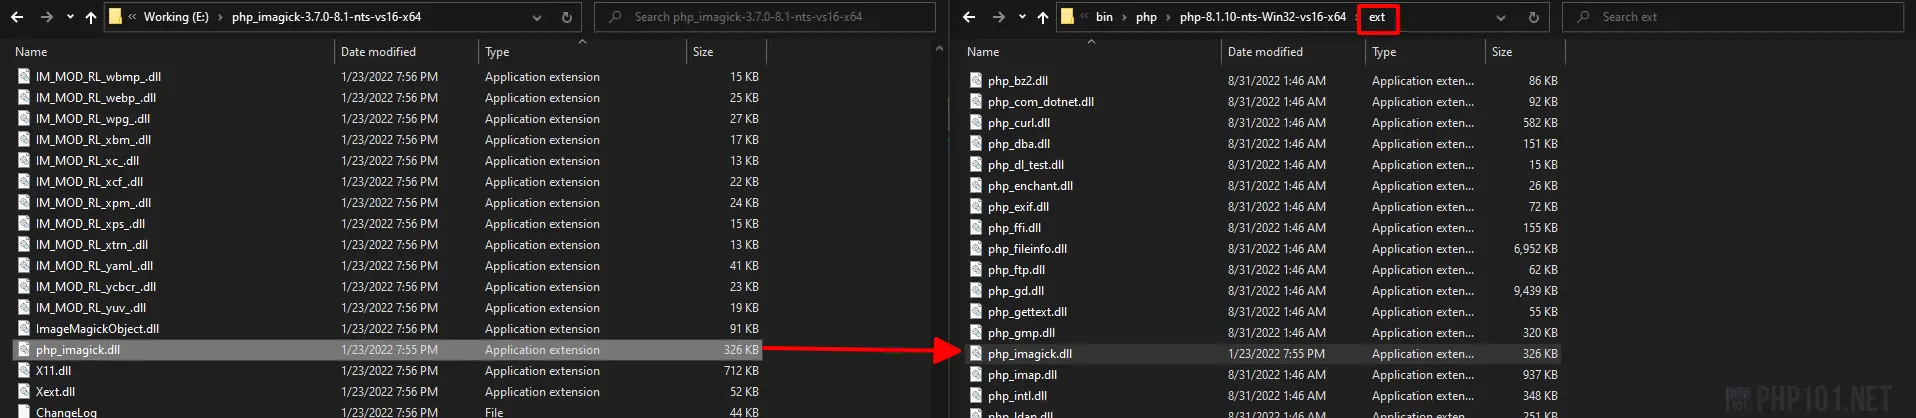
The installation is now finished. Remember to restart the webserver for it to take effect.
5. Verify PHP ImageMagick extension working
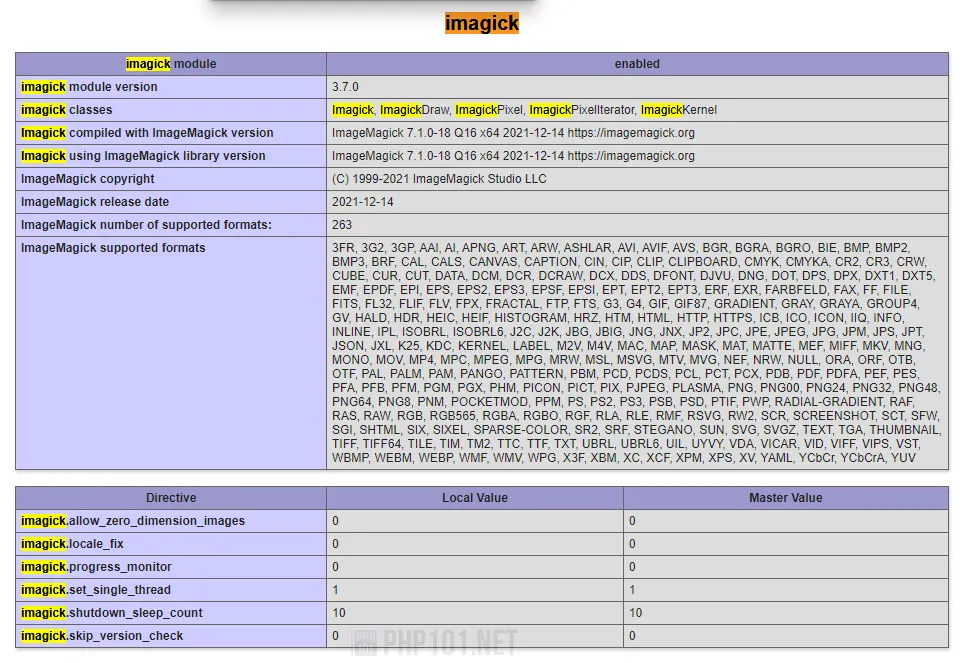
To verify that the PHP ImageMagick extension is working properly in Windows, we have multiple methods. The easiest way is to view PHPInfo and check whether the ImageMagick PHP extension is displayed.
Create a php file with the following lines:
Open the file on your browser, and search for imagick. If this section exists, the PHP extension for ImageMagick on Windows is fully installed and should be working properly (with the condition that ImageMagick package is also installed):
The tutorial is now over.
Final thoughts
We hope this detailed tutorial can help you to get ImageMagick on Windows and its PHP extension to be installed and working properly on Windows operating system. There will be other tutorials and how-to articles on using ImageMagick properly and efficiently, as it is a very powerful yet simple to use in PHP for manipulating images.